Simple Way to Prepare Speedy Russian Paskha
Hello everybody, it's Brad, welcome to our recipe page. Today, I will show you a way to make a special dish, Step-by-Step Guide to Make Award-winning Russian Paskha. One of my favorites. This time, I am going to make it a little bit tasty. This will be really delicious.
Let's face it, cooking isn't a high priority from the lives of every man, woman, or child on the planet. In fact, much too people have left learning to cook a priority in their own lives. Which usually means that people frequently exist on power foods and boxed mixes rather than taking your time and effort to prepare healthful meals to our families and our own personal enjoyment.
The same holds true for lunches when we usually add to a can of soup or box of macaroni and cheese or some other similar product as opposed to putting our creative efforts into producing an instant and easy yet delicious lunch. You may see many ideas in this report and the hope is that these ideas will not just enable you to get off to a wonderful beginning for ending the lunch rut most of us seem to find ourselves at at a certain point or another but also to use new things on your very own.
Cooking healthy isn't an overnight shift; it's a lifestyle change which should be implemented one step at a time. You do not need to go to your own kitchen and through every small thing that you deem'unhealthy' only work to not buy more of these items once they have been used. Make wiser decisions when purchasing fats for food prep and you may discover that you've made an extremely important phase in the procedure for incorporating healthy cooking and eating customs at house.
Many things affect the quality of taste from Russian Paskha, starting from the type of ingredients, then the selection of fresh ingredients, the ability to cut dishes to how to make and serve them. Don't worry if you want to prepare Russian Paskha delicious at home, because if you already know the trick then this dish can be used as an extraordinary special treat.
As for the number of servings that can be served to make Russian Paskha is 6 servings. So make sure this portion is enough to serve for yourself and your beloved family.
Just in addition, the time it takes to cook Russian Paskha estimated approx 60 mins. (+48h).
To get started with this particular recipe, we must prepare a few ingredients. You can cook Russian Paskha using 7 ingredients and 11 steps. Here is how you can achieve that.
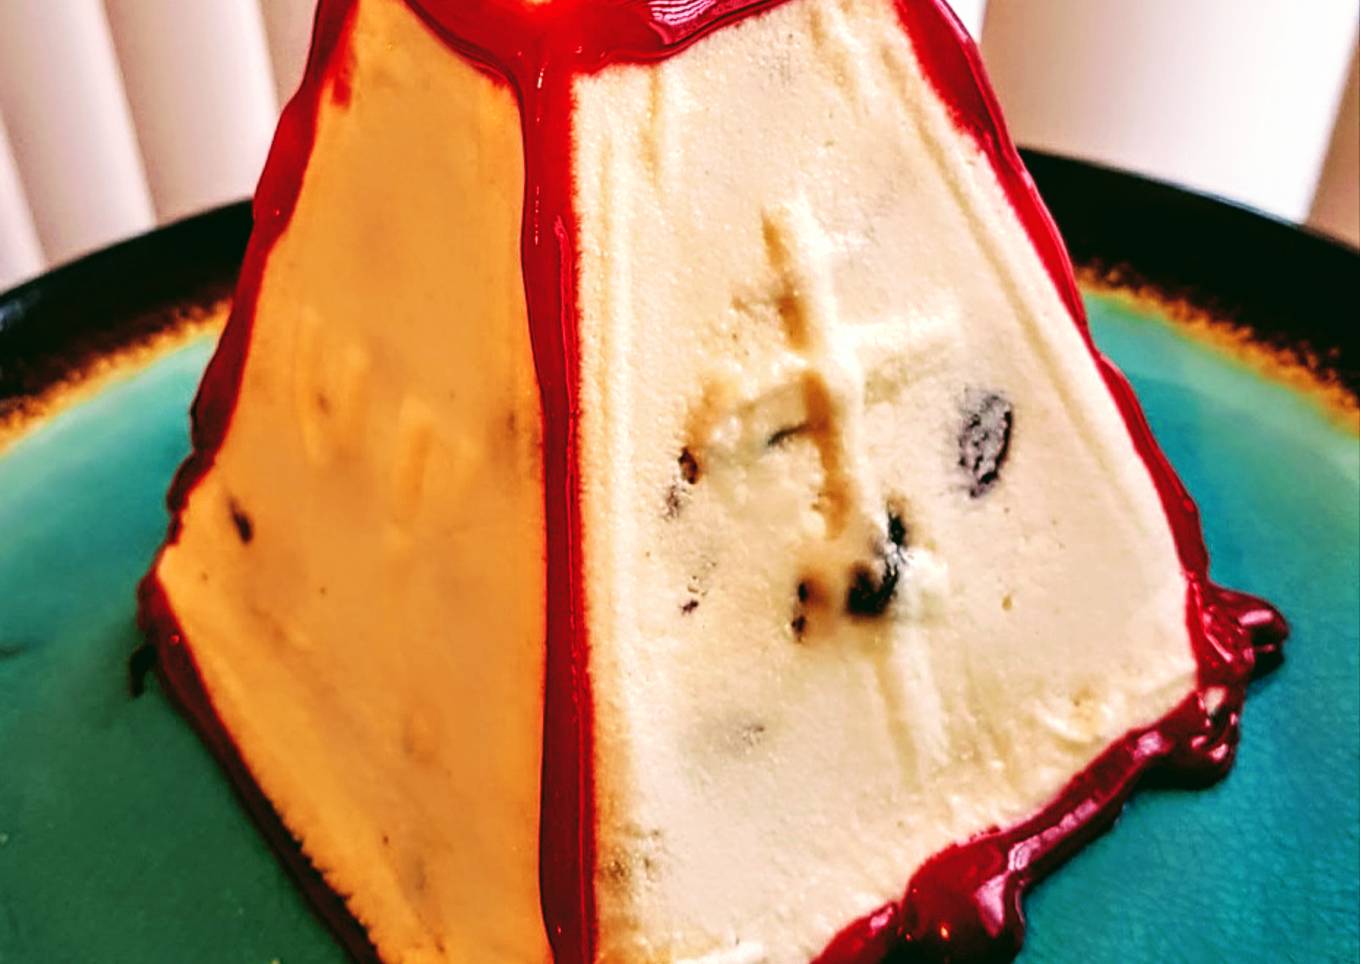
Paskha is a festive dessert dish served during the celebration of Easter in the Russian Orthodox homes following the Great Lent. There are many variations of the recipe depending on the ingredients you have access to. This one in particular will guide you through the process using the ingredients you can find in any grocery store. Keep in mind that while the actual preparation time is about an hour, you have to consider a 2-3 day draining time in the fridge before serving.
Ingredients and spices that need to be Prepare to make Russian Paskha:
- 600 g Ricotta (to replace quark)
- 1/2-3/4 cup 14% (or fatter) sour cream
- 1/2 cup unsalted butter
- 1/2 cup rinsed and dried raisins
- 1 tsp vanilla sugar
- 1/2-2 tsp white sugar (depending on how sweet you want it to be)
- 1/4 cup succade and/or crushed hazelnuts (optional)
Steps to make Russian Paskha
- You will also need a Paskha plastic mold (such as this one: https://www.amazon.com/dp/B00HNVFXWE/ref=cm_sw_r_cp_apa_fUpXBbCAPHHW2) and a cheesecloth (approximately 2' x 2'). Preparation: Thaw the butter for 2 hours outside of the fridge until soft (can also use microwave). Meanwhile, pour boiled water over raisins and let sit for 10 minutes. Drain and let raisins dry.
- Strain ricotta through the mesh strainer 3-4 times to give it the fluffy consistency of the quark. Leave it in a bowl.
- In a separate container mix all the sugars with the sour cream. Blend the mixture with spoon until it becomes liquid.
- Add the obtained sweet mixture to the fluffed ricotta.
- Add the softened butter to the bowl as well.
- Whip the contents of the bowl using a mixer on medium speed.
- At this point, add the raisins (+ optional: succade and/or crushed hazelnuts) to the final mix. Blend them well evenly into the mix.
- Carefully line the Paskha mold with the cheesecloth (opening towards the wider end of the mold). Make sure you have enough loose cheesecloth at the opening. Slowly pour the final mixture into the lined mold. Hold the cheesecloth edges to prevent it from being sucked into the mold.
- Close the wider mold opening with a few layers of loose cheesecloth. Place the mold on a small grill. Place the grill on top of a glass bowl. The bowl will serve as the draining dish. Place a heavy object (preferably a jar) of 2 L or more on top of the mold. This will serve as the weight to apply pressure and drain the excess moisture from Paskha. Place the mold and the draining system into the fridge.
- Allow Paskha to be drained for 2-3 days prior to serving. Once ready, flip the mold carefully onto the serving dish, and remove the mold, then the cheesecloth.
- Optional: May decorate with sugar icing for presentation.
You will also discover as your experience and confidence develops you will see yourself increasingly more often improvising when you proceed and adjusting recipes to meet your personal preferences. If you'd like less or more of ingredients or want to produce a recipe somewhat less or more hot in flavor that can be made simple alterations on the way to be able to achieve this goal. Put simply you will start punctually to create recipes of one's very own. And that's something that you won't of necessity learn when it has to do with basic cooking skills to novices however, you would never learn if you didn't master those simple cooking skills.
So that's going to wrap it up with this special food Easiest Way to Make Homemade Russian Paskha. Thank you very much for reading. I am confident that you will make this at home. There's gonna be interesting food in home recipes coming up. Remember to bookmark this page in your browser, and share it to your loved ones, friends and colleague. Thanks again for reading. Go on get cooking!